Tuesday, December 9, 2014

Two new handmade books: a Journal & a Sketchbook

Two sweet handmade books. A journal and a sketchbook. Now for sale in my Etsy shop.

 This is a lovely, handmade, wraparound journal. Created with the softest, most beautiful leather!
 Measures 6x5" on the outside. Pages are 4x5.5". Each page was created by antiquing 20lb paper, and all page edges have been hand deckled to give them an antiquated look. Find it HERE.
 There are four signatures with traditional long stitch binding. Total of 80 pages, 160 SIDES to write or draw upon!
 Ships in a priority box, so you'll get it FAST!
This would make a really sweet gift for the journal keeper in your life!
 Sketch Book....
Sweet wraparound journal-sketchbook to tuck into your backpack or bag. Ready for your sketches or journal writing! Beautiful paper for medium to heavy weight applications, light color washes or colored pencils. 67 lb. Bristol Forest Stewardship Council (FSC) certified, 30% Post-Consumer Recycled Content, Acid-free and lignin-free for long lasting preservation.

  All pages have been hand-deckled for that lovely watercolor paper finish. Four signatures gives you 96 sides to draw or write on. Closure is a hand-braided long artificial sinew cord secured with a ceramic bead.  Find it HERE.


Monday, December 8, 2014

Journal making class

I love teaching smaller workshops! Yesterday, Vita and her granddaughter Rachel, learned to make personal journals. Originally, I offered the Le Petit Journal class, to make tiny 2x3" mini books. But both Vita and Rachel wanted larger journals to write in. So I practiced in the morning and figured out the techniques for the larger journals, and we were all so happy with the results. Basically, it's the same technique as the small books, just LOTS more paper! First we dyed the paper with a coffee soak, then ironed them dry. Made for a beautiful, antiquity look. We used my little 'Zutter' to deckle the edges of the papers. Made for really nice, chunky books.


I'll take some close ups when I unpack today.

Saturday, December 6, 2014

Le Petit Journal Tutorial (in progress)

Hello friends.... I'm teaching another mini journal class tomorrow: 'Le Petit Journal'. I've been asked for a written tutorial, because it's hard to remember after class. While I'm still working out the written part, here is the visual diagram of the long stitch binding (so much easier for me to understand)...

And here's my rough draft of the written instructions. I'm open to any critique, proofreading, or helpful suggestions!

-->
Basic Instructions for Leather Book


1.         Decide the size book you want


2.         Cut or tear papers to size


3.         Fold paper in half and create signatures to desired thickness

            Stain edges of papers if desired


4.         Cut out the leather to size, measuring around stacked signatures, leave overlap if wanted


5.         Cut endpaper to size, place on inside of leather cover (you will trim the ends later)


6.         Make a template from the signatures, marking three holes


7.         Lay your first signature on left side of leather and end paper

            Pencil mark the end paper and signature where the holes will be punched


8.         Punch first set of holes in leather using template as your guide

Punch holes in the first signature also using template as your guide


9.         Cut sinew 2 ½ x the height of book


10.         Place first signature near left inside the book, not all the way, leave room for folding.


11.         Open signature and…

  Sew in thru the middle hole of signature, end paper and leather, out to the back

              Then in thru the top (outside) hole, thru the signature, then out through the bottom hole

              Come back in from outside at the middle hole, keep needle on opposite side of long stitch

              Pull both ends tightly, tie off, and press into hole, clip ends.


12.         Make crease front end paper towards signature. Press the fold sharp, then press leather.


13.         Place second signature close to the first, mark holes on endpaper and signature

              Punch holes in endpaper and leather, punch holes in signature

 Proceed to sewing as you did in the first signature


14.         Continue with each signature. On last signature, crease the endpaper towards the left, then press leather.


15.         Finish with closure of your choice.


Monday, November 17, 2014

A wonderful day creating Spirit Dolls!

Firstly, I want to thank Joyce Leonard for allowing us to create our Spirit Dolls in her lovely, and sacred, Reiki Center. (Joyce is a wonderful teacher and healer if you should be so inclined to desire Reiki, lessons or treatments. Santa Cruz Reiki Works. )

As you look through these mostly candid photos, you'll notice the focus on each person's face! Our meditation took us deep, then the Spirit of each person's doll did all the directing.
Choices! So many faces, feathers, fibers to choose from!
 And many twigs, sticks, and driftwood pieces to form the body...
 Everyone is so focused on their creations!

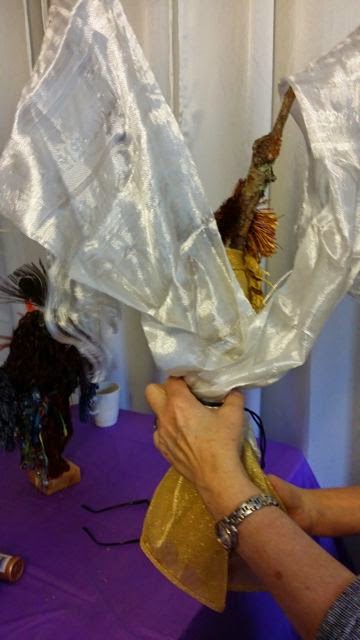
 After binding the arms and body, we wrap batting and secure it with torn strips of muslin.


 Moving onto costuming and adorning the dolls... again, requires deep focus.
 Here, Mary is auditioning her doll's hair... wait till you see how she arranged the hair!

 Rosie found herself immersed in reds.... Rosie is also the youngest Spirit Doll maker I've worked with. She did amazing! Such confidence to create exactly what she wanted. You'll see her doll towards the end of this post.


 Larrissa, Rosie's mom, is engrossed in her own work.
 Pat, gazing at her amazing Spirit Doll. She used a beautiful blend of lavender and purple roving for hair.
 Here's Rosie and her beautiful creation in red....
 Rosie's mom, Larissa, and her creation... I love how the twigs extend both above and below.

 Rosie's Grandpa Geoff (the first man I've taught!) His doll had strong vibrations of a Katchina.

 The colors are rich and vibrant!
 Here's Mary's doll, being outfitted with her own sacred pouch.
 Sorry, the picture is blurry...
 Close up... don't you love the feathers?
 Mary is posing with her childhood Angel Friend... very sweet and full of good energy!
 Here's what I referred to about how Many handled the hair! There was a little too much fringe, so she rolled it back on both sides, along with a piece of ribbon... made for an amazing, dramatic look!

 Michele used beautiful hues of the Fall... she says the doll's hair kind of created itself... just appeared! It looks stunning!
 Arg.. again with the blurry photo... but you can see the many hues of the hair!
 The hair even winds around the back...
 We completed the day in a circle, each sharing how the process was for them, plus, what they feel their Spirit Doll is here to teach them.

In the center of his photo is Patria and her amazing feathered doll. I think my camera ate the portrait of her and her doll. This Spirit Doll is off the charts! Patria thinks she might suspend her from the ceiling so the many, many feathers can float in the breeze. Brings to mind the blessings of Tibetan prayer flags.
 
 What a blessed day it was. Four hours were gone... but what was left are some wonderful memories, the sacred fullness of creation, and the blessings of eight new Spirit Dolls.
Sweet blessings!